
Lipstick, a makeup staple for millennia, has long been a way to express oneself, convey mood, and enhance beauty. But in recent years, there has been a growing concern about the chemical components used in commercial lipsticks. These concerns have led many to explore the world of DIY natural lipsticks. Imagine a lipstick tailored just for you, using ingredients you trust – sounds dreamy, doesn't it? Dive into the world of DIY natural lipsticks and kiss harmful chemicals goodbye!
Why Go Natural?
- Safety: Many commercial lipsticks contain chemicals, dyes, and preservatives, some of which can potentially be harmful. Natural ingredients are gentler on the skin and health-conscious.
- Customization: With DIY lipsticks, you're the artist and the creator. You can play with shades, hues, and textures to create something uniquely yours.
- Eco-Friendly: Natural ingredients are typically more sustainable and environmentally friendly. Plus, you can often reduce waste by reusing containers.
Basics to Start Your Natural Lipstick Journey
Before diving into recipes, it's essential to understand the primary ingredients:
- Waxes: They give the lipstick its structure. Beeswax is the most common, but candelilla or carnauba wax are vegan alternatives.
- Oils: These provide moisture. Popular choices include coconut oil, jojoba oil, almond oil, and shea butter.
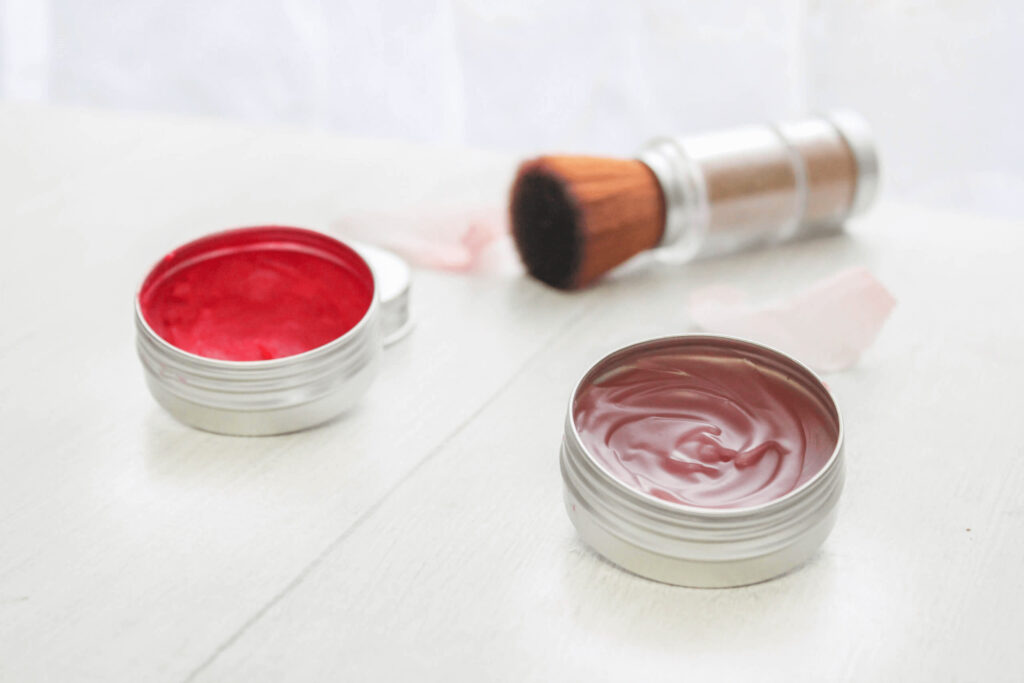
- Pigments: This is where the fun begins! Use natural ingredients like beetroot powder for reds, cocoa powder for browns, and turmeric for golds. You can also find natural micas in various shades.
The Basic DIY Natural Lipstick Recipe
Ingredients:
- 2 teaspoons of beeswax or vegan wax
- 2 teaspoons of coconut oil or shea butter
- Color pigment (amount varies based on desired shade)
Steps:
- Melting: Use a double boiler or a microwave (in 20-second bursts) to melt the wax and oil together.
- Mixing: Once melted, add your chosen pigment a little at a time. Mix thoroughly until you achieve the desired shade.
- Testing: Before it cools completely, you can test the shade on your wrist to see if you'd like to adjust the color.
- Molding: Pour the mixture into empty lipstick tubes or small containers. Let it cool and harden for several hours.
Get Creative: Unique DIY Natural Lipstick Ideas
- Shimmery Shades: Add a pinch of edible glitter or shimmering mica powders.
- Lip Plumping: Add a drop or two of peppermint or cinnamon essential oil for a natural lip plumping effect. But be cautious – a little goes a long way!
- Scented Lipstick: Add a drop of your favorite essential oil like vanilla or lavender for a calming, aromatic experience.
- Moisture Boost: For ultra-hydrating lipstick, add more oils like vitamin E or avocado oil.
Tips & Tricks
- Shelf Life: Remember, natural lipsticks don't contain preservatives, so they generally have a shorter shelf life. Use them within 6-12 months.
- Storage: Store your DIY lipsticks in a cool, dry place. If you live in a hot climate, consider refrigerating them.
- Patch Test: As with any beauty product, always conduct a patch test to ensure no allergic reaction to the ingredients.
- Perfecting Texture: If your lipstick is too hard, add more oil. If it's too soft, add more wax.
The Allure of Natural Beauty
In an age where every product is dissected and evaluated for its environmental impact and health implications, it's no wonder the allure of natural beauty products, particularly DIY lipsticks, has blossomed. Our lips are one of the most sensitive parts of our body and deserve the utmost care. By choosing to craft our lipstick, we’re not only ensuring quality but also embracing sustainability and self-expression.
Deep Dive: Why Natural Lipsticks?
- Skin Health: Our skin can absorb what we put on it, including lipstick. By opting for natural ingredients, we minimize exposure to potentially harmful chemicals, preserving the natural health and radiance of our lips.
- Ethical Choices: Many natural ingredients are cruelty-free and ethically sourced, ensuring that our beauty routine doesn't come at the expense of the environment or other living beings.
- Economic Sense: Over time, making your lipstick can be cost-effective, especially if you use ingredients that you already have for other beauty or cooking purposes.
Understanding Your Ingredients
Every ingredient plays a vital role in your DIY lipstick:
- Waxes: Apart from structure, waxes also provide a protective barrier, locking in moisture. Some people find that different waxes offer varied consistencies, so experimenting can lead to your preferred texture.
- Oils: These are the hydrating champions. Different oils offer various benefits: for instance, argan oil provides a silky touch, while castor oil gives a glossy finish.
- Pigments: While natural ingredients like beetroot and cocoa powder are fantastic, for more vivid and varied colors, natural mineral pigments like iron oxides can be purchased. They're safe and offer a broader color range.
Crafting Your Signature Shade
Consistency Matters: The ratio of wax to oil will determine the lipstick's firmness. A higher wax ratio creates a harder lipstick, ideal for tubes, while a higher oil content creates a softer, glossier finish, perfect for pots.
Tints & Hues: The beauty of DIY is customization. For a muted tint, start with a small amount of pigment. For a more opaque lipstick, increase the pigment ratio. Always remember, it’s easier to add more pigment than to dilute it, so build your color gradually.
Advanced DIY Natural Lipstick Techniques
- Dual Shades: For an ombre effect, make two shades of lipstick. Apply the darker shade on the outer parts of your lips and the lighter shade in the middle. Blend gently for a gradient look.
- Lip Exfoliants: Combine some sugar with your lipstick formula (minus the wax) to create a tinted lip scrub. It’ll exfoliate and color your lips at the same time!
- Tinted Lip Balm: For those wanting just a hint of color, create a tinted lip balm by reducing the pigment and increasing the oil content. Add flavors like cherry or mint for an extra twist.
Preserving Your Creation
While natural lipsticks lack the preservatives found in commercial products, adding a few drops of vitamin E oil can extend their shelf life. It acts as a mild preservative and offers additional moisturizing benefits.
Final Thoughts
The journey to crafting the perfect pout is one of creativity and discovery. Not only do you get a product that resonates with your ethos and style, but you also gain a deeper understanding and appreciation for the art of makeup. With every swipe of your DIY natural lipstick, you'll feel the joy of personal creation and the confidence of natural beauty. So, embark on this colorful journey and let your lips tell a story of nature, health, and individuality!